With the introduction of native file manager, Apple made it easier for iPhone users to share documents in iOS 11. This document management not only includes sharing of files but also takes in editing of documents and adding more people to the shared document in Files app. There are different features of this new wave of changes, but you would like to begin with how to share documents from iOS 11 Files app on your iPhone and iPad.
However, when you invite people to make changes, there is always a danger of shared documents being tampered with. In this scenario, you can either stop sharing documents or prevent such users from making any changes in those shared docs. A severe action would be to deny access to your shared files or documents; simply remove users from accessing and modifying the shared documents in Files app.

How to Share Documents from iOS 11 Files App on iPhone and iPad
- How to Share Documents in Files App in iOS 11 on iPhone and iPad
- How to Invite People to Make Changes to Documents in Files app on iPhone and iPad
- How to Add More People to the Shared Document in Files App
- How to Remove Individual People from Accessing Your Shared Document in Files App
- How to Completely Stop Sharing the file with any person on Files App?
How to Share Documents from Files App in iOS 11 on iPhone and iPad
Step #1. Open the Files App on your iOS 11 device.

Step #2. By default, you are on Locations screen. Tap on Browse button located at the bottom tab.
Step #3. Now under the Locations section, select the cloud service where you have saved your files.
Step #4. For the purpose of this guide, iCloud Drive will be taken as reference.
Step #5. Now tap the Folder containing the file you want to share.
Step #6. Next, once you get to see all the files inside the folder, press and hold on one of the files you want to share.
Step #7. A list of options will appear above the selected document. There are multiple options you can browse with an arrow at the end.
Step #8. Tap on the Share button. If you don’t see the share button, then navigate through the options in the pop-up by using the small arrow buttons. The share button should be in there.

Step #9. There is also an alternative. Just open the file you want to share. Once inside the file, there should be a share option available.
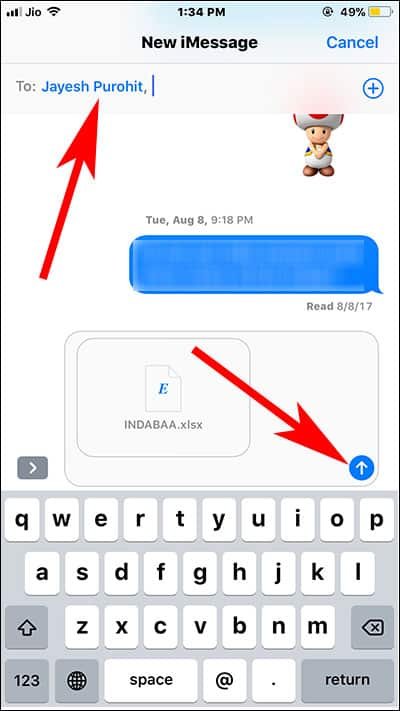
Step #10. Once you have tapped on share, another pop-up will show you a list of apps through which you can share the file. For the sake of this guide, Message app is going to be the medium for sharing the file.
Step #11. Now enter the name of the receiver and press on send like you do with messages.
Now that we have got this figured out, let’s see how you can invite people to make changes to Documents in Files App on your iOS 11 Device.
How to Invite People to Make Changes to Documents in Files app on iPhone and iPad
Step #1. Much like the previous method, Open Files app → tap on Browse Tab → Select the iCloud Drive under Location → Tap on the Folder containing the File → Now press and hold the Document you wanted to share → in the pop-up of options, tap the Share button.
Step #2. After you tapped on the share button, a bigger pop-up will show up to showcase apps to use as mediums to share your file.
Step #3. In this pop-up, if you look down, there is also the option to Add People located in the share sheet.
Step #4. Tapping the option will open up a screen which asks you how you would want to invite people to share this file.
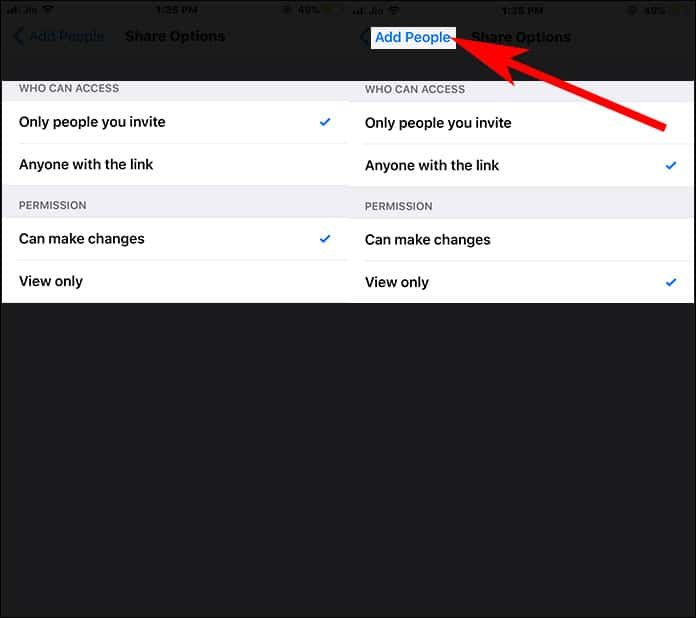
Step #5. In case you want to exercise some control over the document, you can tap on Share Options located at the bottom of the screen.
Step #6. First, you will have to choose who can access your doc:
Options include:
- Only People you Invite.
- Anyone with the Link.
Then you will get the option to manage permissions:
- Can make changes.
- View only.
For the purpose of this guide, we will be choosing Only People you invite and Can make Changes. You can choose whatever options you like.
Once you are done, tap the Back button to go to the previous screen.
Step #7. Now you have to select the medium through which you would like to send the invitation. Here too we will be using the Messages app. So we will be tapping on messages.
Step #8. This will open up the app and we will simply have to add the recipient and tap send.
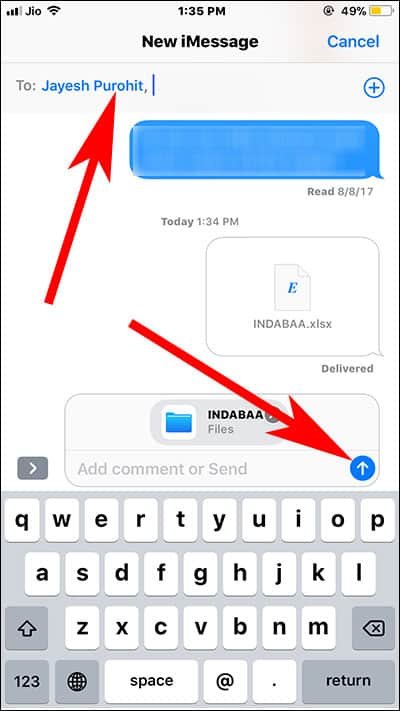
Okay, so now we have managed to share a document with one person. How about sharing a document in files app with multiple people in iOS 11?
How to Add More People to the Shared Document in Files App
Step #1. Open Files app → Browse tab → iCloud Drive → Desired Folder → Select a Document which has been already shared → Tap on the Share button.
Step #2. Now you will see an option called Show People. This will be right there where you had previously seen Add people. Now select Show people.
Step #3. In the next screen, there will the names of the people with whom you have shared the document. There will also be an Add People Option. Tap that.
Step #4. Again, you will be brought to the Add People Screen. You can again go into the Share options to adjust your preferences and then choose the medium for sharing the file. Once all is set and done, tap Send like before.
But what if you have accidentally added someone you don’t want to share the document with? How to remove a person from Accessing the Shared Document in Files App?
How to Remove Individual People from Accessing Your Shared Document in Files App
Step #1. Again, open the Files app → Browse Tab → iCloud Drive → Folder → select the Shared Document and tap on it → tap on the Share button.
Step #2. Now like before, tap on the show people button in the pop up screen.
Step #3. Here you will see all the people with whom you are sharing the file. Tap on the person whom you want to remove from gaining access to your file.
Step #4. A screen will open up showing options to change the permissions given to the person. After the permission, there will be an option to Remove Access. Tap it and confirm that you want to remove the individual.
How to Completely Stop Sharing the File with Any Person on Files App
Step #1. Launch the FIles App → Select the Browse Tab → go to iCloud Drive → Select the Folder you containing the desired file → Tap on the shared document → Now, tap on the share button.
Step #2. Select Show People.
Step #3. Below the list of all the people sharing the document, there is an option to Stop Sharing the file. Tap on the option and tap OK on the confirmation pop up.
And voila, all the people with whom you have shared access of the file have been removed.
Also Check:
- How to Add Dropbox to Files in iOS 11
- How to Transfer Files from Cloud Storage Services
- How to Recover Recently Deleted Documents in Files App on iPhone or iPad
- How to Fix iCloud Storage Full Issue
Want to share documents in Files app in iOS 11? Share your feedback with us on Facebook, Twitter and Google Plus.