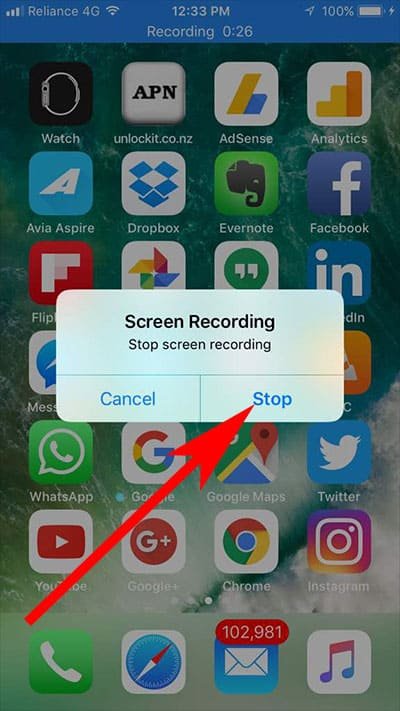
Earlier, users had to rely on third-party apps to record iPhone screen. But with the release of iOS 11, they don’t need to use any such software; neither should they connect their iPhones with Mac or Windows computer. That’s amazing! If you want to record screen in iOS 11 on iPhone or iPad, read this simple method.
This screen recording feature is integrated in the Control Center in the latest iOS 11 by Apple. All you need is to enable this feature once to start recording your screen in iOS 11. Once you stop recording iPhone screen, the recording will be saved in Photos app automatically. Later on, you can record, trim, edit, and share video on iPhone and iPad.
How to Record iPhone and iPad Screen in iOS 11
- How to Enable Screen Recording in iOS 11
- How to Start Recording iPhone or iPad Screen with Screen Recording Feature in iOS 11
- How to Record iPhone Screen with Sound in iOS 11
- How to Edit Screen Recording Videos in iOS 11
- How to Stop iPhone/iPad Screen Recording in iOS 11
How to Enable Screen Recording in iOS 11
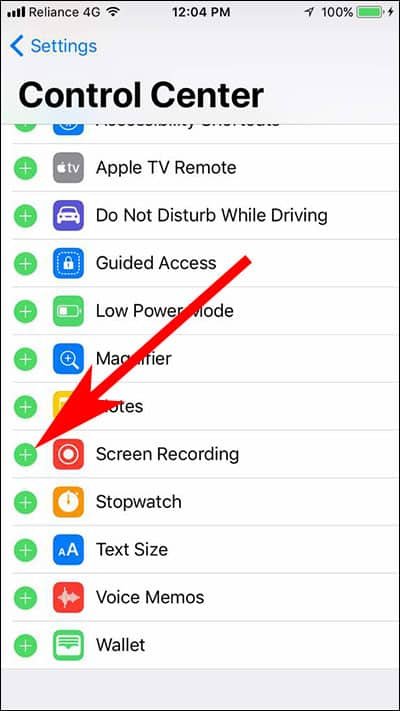
Step #1: First off, open Settings app on your iPhone or iPad.
Step #2: Scroll down a bit and tap on Control Center.
Step #3: Under the MORE CONTROLS, there lies an option of Screen Recording.
Step #4: Tap on that plus symbol in green circle and the option will be added to INCLUDE.
Now you are all set to record your iPhone or iPad screen in iOS 11.
How to Start Recording iPhone or iPad Screen with Screen Recording Feature in iOS 11
Step #1: Come back to the home screen of your iPhone or iPad, and swipe up from the bottom to bring up Control Center.
Step #2: Now tap on Recording icon (circle within a circle) to start capturing your iOS device’s screen.
This will initiate the screen recording on your iPhone or iPad.
How to Record iPhone Screen with Sound in iOS 11
Step #1: Swipe up from the bottom to access Control Center on your iPhone.(Check this guide to access Control Center on iPhone X)
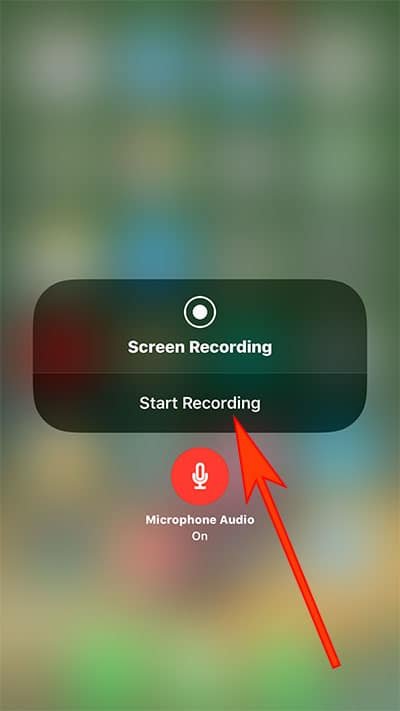
Step #2: Press and hold screen recording button to apply 3D touch.
Step #3: Next, tap on microphone Audio icon turn ON or OFF.
Step #4: Finally, tap on Start recording to start recording screen with sound.
How to Edit Screen Recording Videos in iOS 11
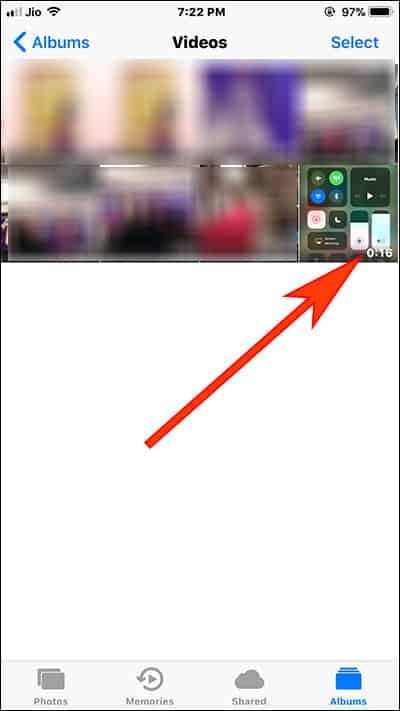
Step #1: Open Photos Apps from your iPhone or iPad.
Step #2: Select the video you have recorded using iOS 11 screen recording feature.
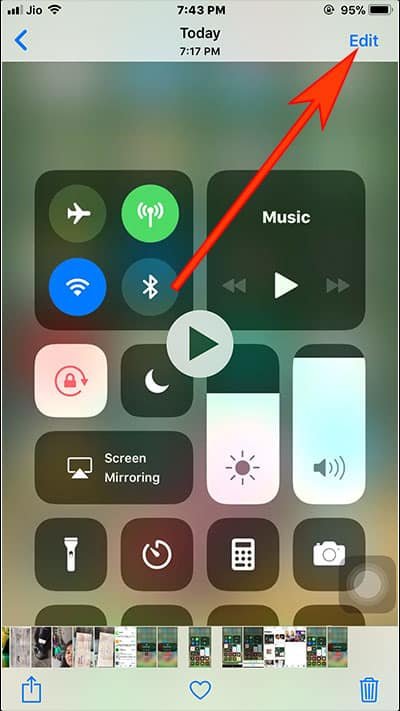
Step #3: Tap on Edit.
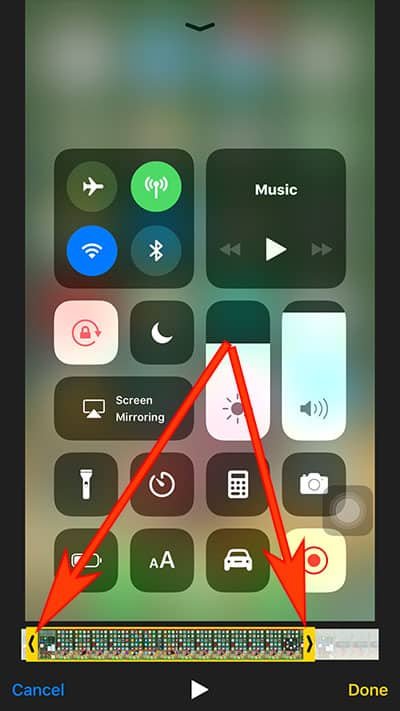
Step #4: To crop video you need to tap and hold on the left or right side of the timeline and move the frame left or right to trim or tap and hold the frame to expand.
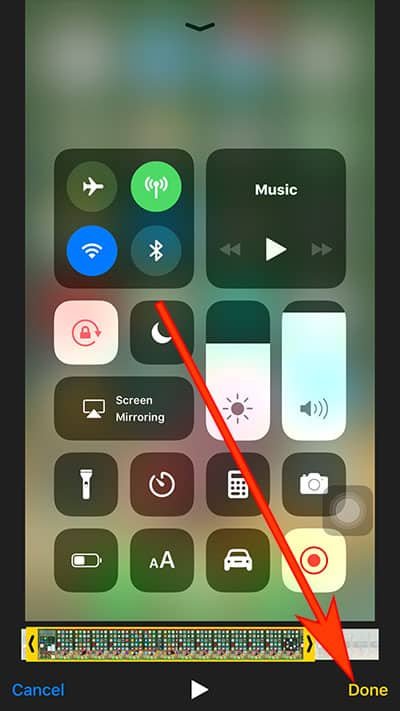
Step #5: Tap on Done.
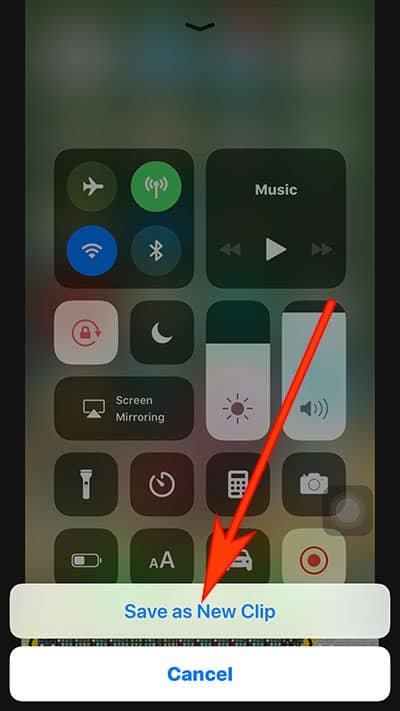
Step #6: Finally, tap on Save as New Clip.
How to Stop iPhone or iPad Screen Recording in iOS 11
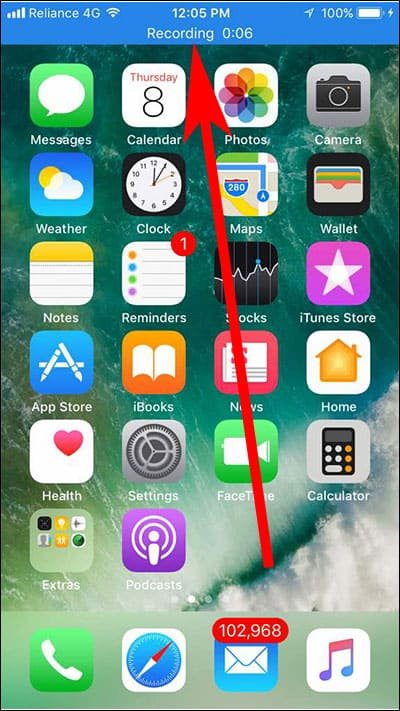
Step #1: After capturing the iPhone screen, you need to tap on status bar seen at the top of your device screen.
Step #2: A pop-up appears on screen with an option to stop recording; simply tap on Stop.
The recording will be saved in Photos app; you can access the recording and share it anywhere.
This new feature will be appreciated by many, especially by content creators who create videos. I am waiting for the day when Apple introduces a feature to record FaceTime video calls on iPhone and iPad. Currently, users have to connect their iPhone with Mac or have to use third-party app to record FaceTime video calls.
Don’t Miss:
- iOS 11 Features
- Hidden iOS 11 Features
- List of iOS 11 Compatible iPhone or iPad
- How to Install iOS 11 Beta on iPhone or iPad
- How to Customize Control Center in iOS 11 on iPhone or iPad
- How to Enable Dark Mode in iOS 11 on iPhone or iPad
Do you like this screen recording feature in iOS 11? Share your feedback with us on Facebook, Twitter and Google Plus.

