When you Sync iPhone Photos to Your Apple Watch, you can easily use those photos as watch face. Normally, users like to view their iPhone photos on Apple Watch. If there are many photos on your iPhone, you will be able to view a slideshow on your Apple Watch, and every time you raise your wrist, you get a different photo as watch face on your Apple Watch. Given this excellent feature, people like to sync iPhone Photos to Apple Watch.
While you are adding photos to your Apple Watch, you can also manage photo storage limit on your iWatch. You can sync as many as 500 photos from your iPhone to Apple Watch; the minimum number is 25. If you change your mind and want to use the default watch face, you can simply remove and unsync all iPhone Photos from your Apple Watch.

How to Add and Remove Photos from Apple Watch Series 3 and 2 in WatchOS 4
Quick Links
- How to Sync iPhone Photos to Your Apple Watch
- How to Manage Photo Storage Limit on Apple Watch
- How to Remove All iPhone Photos from Apple Watch
How to Sync iPhone Photos to Your Apple Watch
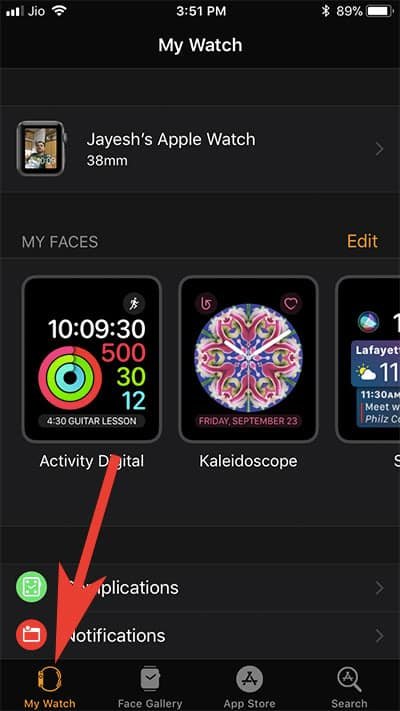
Step #1: Open Watch App on your Paired iPhone.
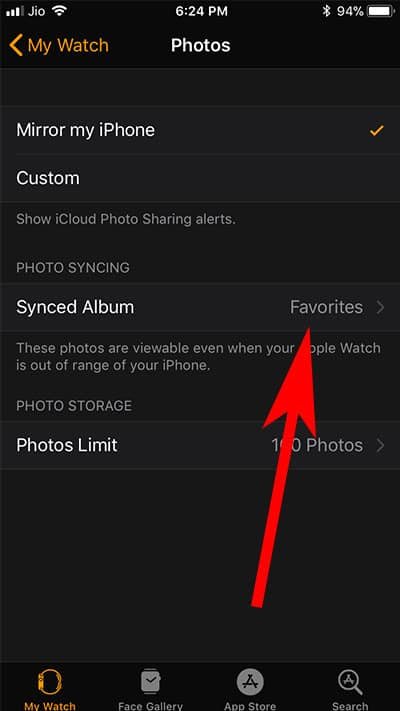
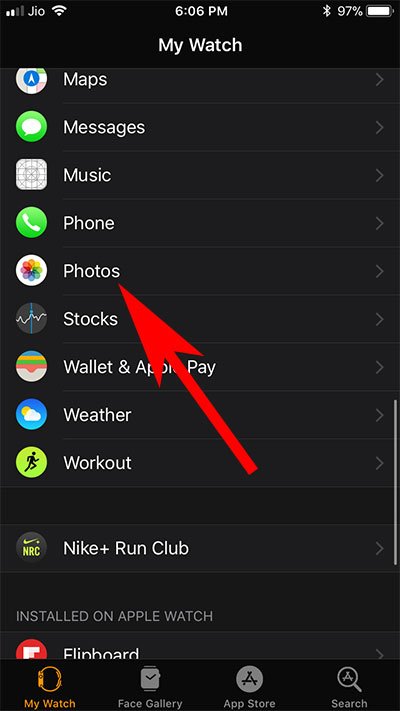
Step #2: Now, tap on Photos.
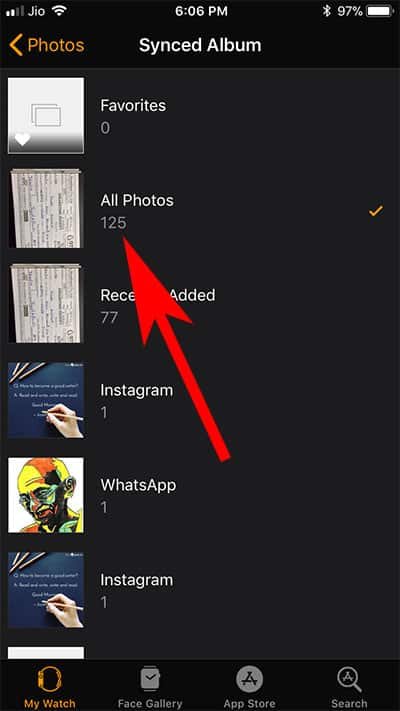
Step #3: Next, tap on Synced Album.
Step #4: Choose Album you want to sync on your Apple Watch.
If you have too many photos in your Photos app then you will have to wait for few minutes till the process gets completed.
That’s it!
How to Manage Photo Storage Limit on Apple Watch
Step #1: Launch Watch App on your Paired iPhone.
Step #2: Tap on My Watch tab.
Step #3: Now, scroll down and tap on Photos App.

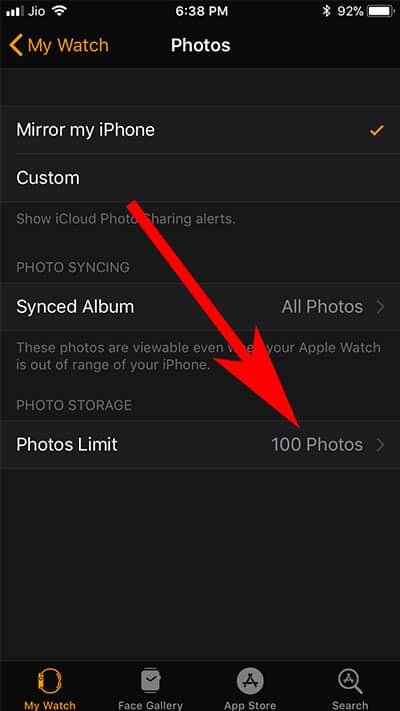
Step #4: Next, tap on Photos Limit.
Step #5: Here you find few options like 25 Photos, 100 Photos, 250 Photos and 500 Photos.
Choose any option wisely, as this will consume your Apple watch storage space.
How to Remove All iPhone Photos from Apple Watch
Step #1: Launch Photos App on your iPhone.
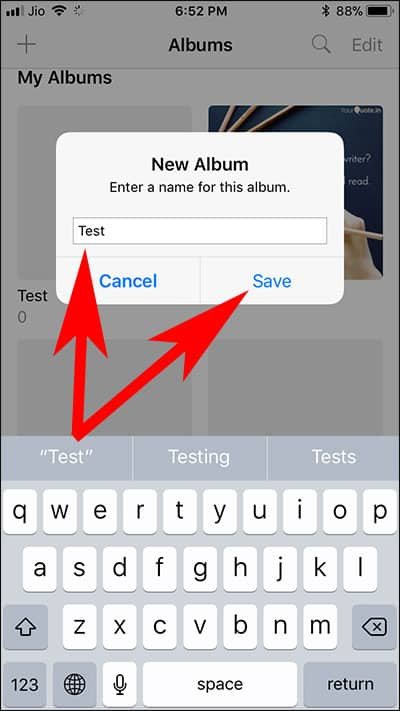
Step #2: Tap on + icon from the top left corner of the screen.
Step #3: Now, Enter any name for this newly created album and tap on save.
Step #4: Don’t Choose any photos, Just tap on Done.
Step #5: Next, Open Watch App.
Step #6: Scroll down and tap on Photos.

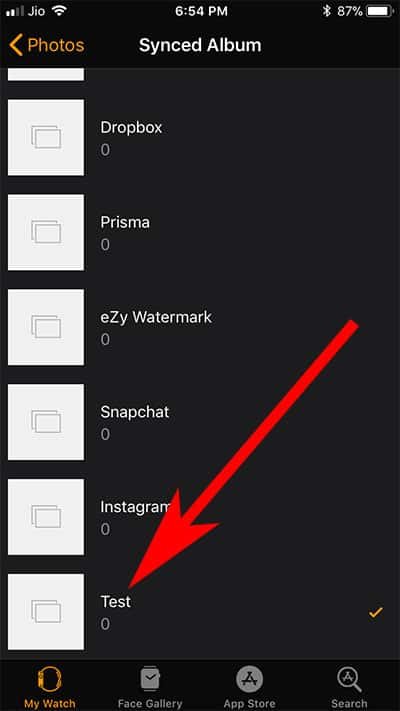
Step #7: Next Up, Tap on Synced Album.
Step #8: Choose the Album Name from the list you have recently created.
Now you won’t be able to see any photos on your Apple Watch as the album is empty.
That’s it friends!
Getting Photos to your Apple Watch is a great way to stay connected with your loved ones. If there are some unnecessary photos in your Album, you can create a different folder in your Photos app and then sync that folder to your Apple Watch to view your choice of photos on your wristwatch.
Also Read:
- How to Set Any Photo as Apple Watch Face
- How to Disable Time to Stand Reminder on Apple Watch
- How to Customize Siri Watch Face on Apple Watch
- How to Add Complications to Apple Watch
- How to Customize Apple Watch Face Color and Style
Do you have anything to share? Write your feedback on Facebook, Twitter and Google Plus.
