Notes app in iOS 11 has witnessed a few welcome changes. You can now create a table, do sketch and write a handwritten note in the recently updated Notes app. For professionals, who have to scan documents, the Notes app offers a bonus. Now users can scan documents with an iPhone or iPad in Notes app in iOS 11.
Floored? Regain your consciousness and read this tutorial that shows you how you can scan documents on your iPhone and iPad running iOS 11. The process of scanning documents is extremely easy. With its enhanced intelligence, Notes app on your iOS device can detect edges and takes a perfect snap when you hold your iPhone or iPad camera app over a paper or document. Once you scan the document, you can save it on your device. Now, let’s see how to use document scanner in iOS 11 on iPhone or iPad.
How to Scan Documents With an iPhone or iPad in Notes App in iOS 11
How to Scan Paper in Notes App on iPhone and iPad in iOS 11
How to Save Scanned Paper in Notes App on iPhone/iPad Running iOS 11
How to Scan Paper in Notes App on iPhone and iPad in iOS 11
Step #1: Open Notes app on your iPhone or iPad.
Step #2: Here, you can either create a new note or use an existing note to scan paper or document.
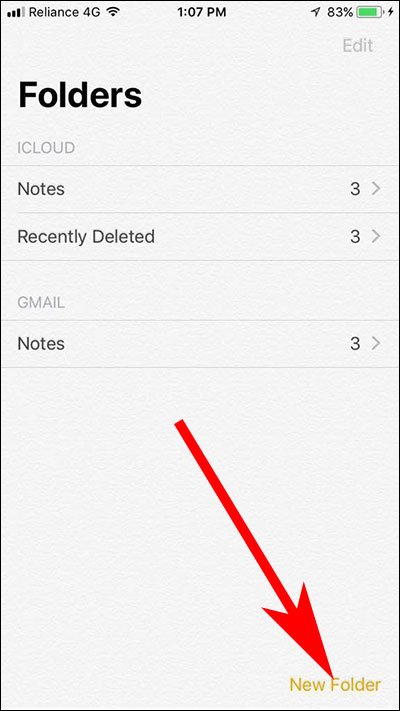
I have created a new note in this tutorial. To create a new note, you can use an existing folder or create a new folder by tapping on New Folder button available at the bottom right corner.
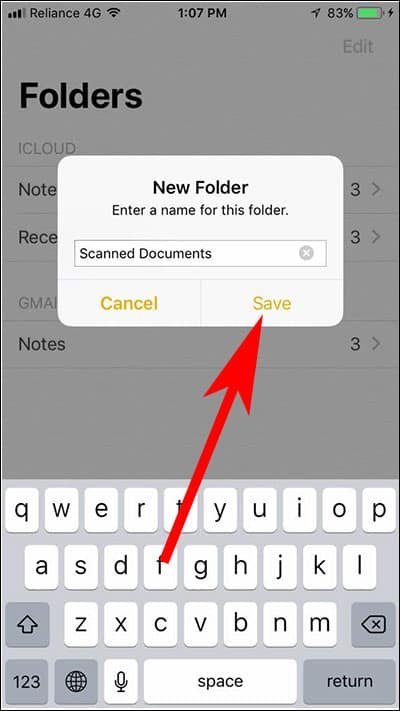
Step #3: Enter a name for this folder.
Step #4: Once you give a name, tap on Save button.
Step #5: Now, tap on new note icon (a pencil and a writing pad seen at the bottom right corner).
Step #6: Next, tap on (+) icon to scan document.
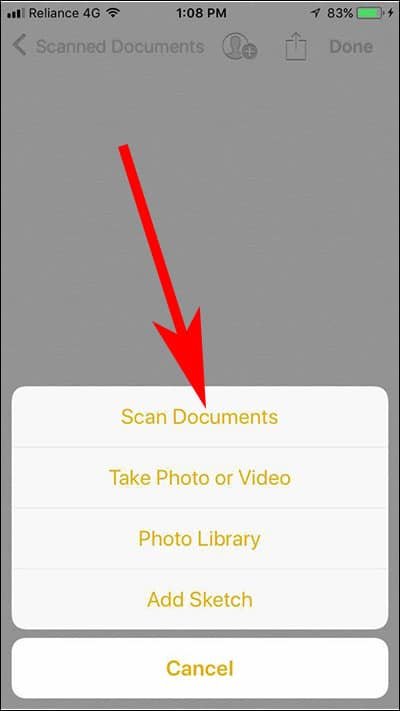
Step #7: A menu will swipe up with four options: Scan Documents, Take Photo or Video, Photo Library, and Add Sketch. You need to tap on Scan Documents.
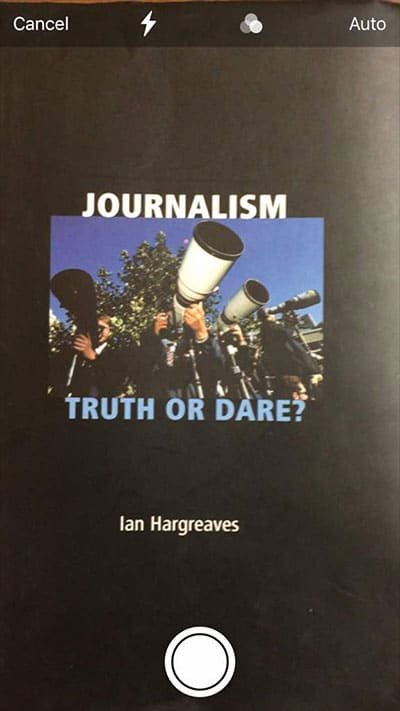
Step #8: This will launch the scanner view on your iPhone or iPad. Now you need to hold the camera app on the paper or document you want to scan, and Notes app will detect borders of the paper automatically and click a photo.
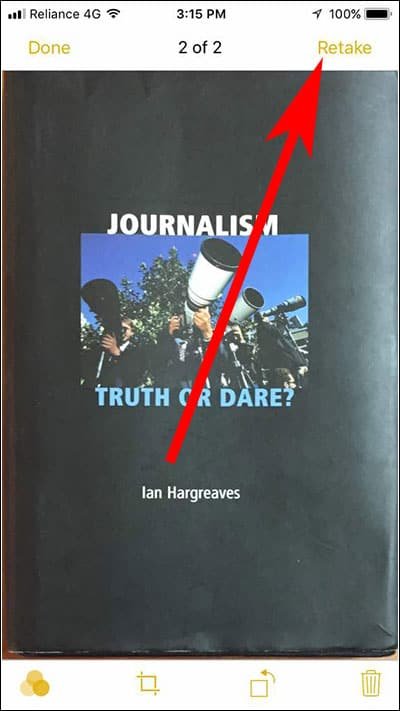
If you are not happy with the result, you can cancel the scanned document and go for the Retake.
In case you are using iPad to scan documents, you can use Apple Pencil to manually adjust the borders of a paper or document.
Recommended: Best Printers for Mac | Best Laser Printers for Mac | Best Inkjet Printers for Mac
How to Save Scanned Paper in Notes App on iPhone/iPad Running iOS 11
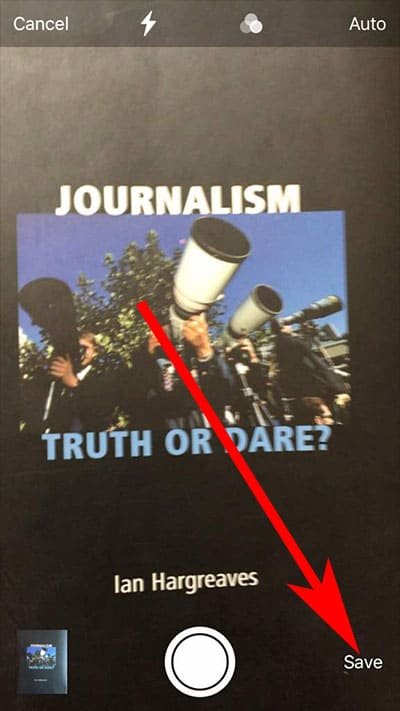
Step #1: You have already scanned a paper in Notes app; if you are satisfied with the result, you can save the scanned document. All you need to do is to tap on Save button from the bottom right corner on your device screen.
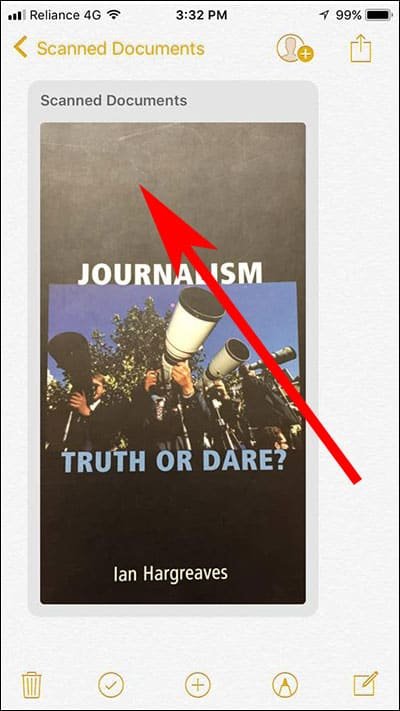
Step #2: Now open the scanned document from the folder and tap on it.
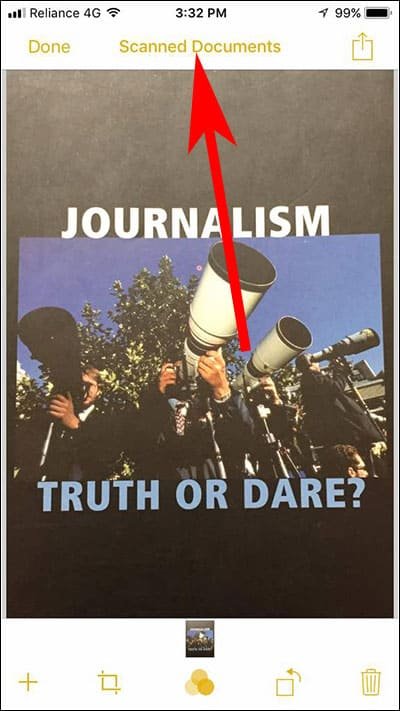
Step #3: You can see Scanned Document on the top center; tap on it.
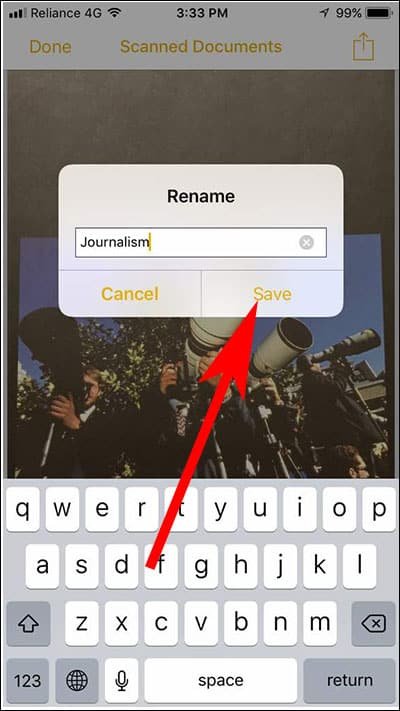
Step #4: You will be allowed to rename the scanned paper via a dialog box.
Step #5: Give a suitable name you can remember and then tap on Save button.
Finally, tap on Done from the upper right corner.
It is done!
Don’t Miss:
- How to Transfer iPhone Notes to Windows PC or Mac
- How to Transfer Files from Evernote to Apple Notes on iPhone and Mac
- How to Use Instant Notes on iPad Pro Lock Screen with Apple Pencil in iOS 11
You have successfully scanned your papers/documents and save them in the Notes app itself. Remember, your saved documents will not be seen in Photos app. You have to access them from Notes app; if you have synced your Notes app with iCloud, you can access your scanned documents from iCloud also.
Like this feature of Notes app? Share your feedback with us on Facebook, Twitter and Google Plus.

