Notes app has not received much attention from Apple developers in High Sierra. However, users have appreciated Notes’ ability to pin and unpin notes. There is another important feature added to Notes app; you can now create tables in Notes app on macOS High Sierra in Mac.
How to Insert Tables in Notes App on macOS High Sierra in Mac
Things we will be discussing in the Article (in Order):
- How to Create Tables in Notes App on macOS High Sierra
- How to Add Column and Rows to your Tables
- How to Rearrange Rows and Columns
- How to Remove Columns from Tables
- How to Convert Text to a Table
- How to Convert a Table into Plain Text
- How to Format Text Inside a Table
- How to Delete content from Multiple Cells
Let’s now waste the time any more time and check how to make a table in Notes on mac.
How to Create a Table in Notes App on macOS High Sierra
Step #1. Open Notes App. It should be on the Dock. If not, use the Finder.
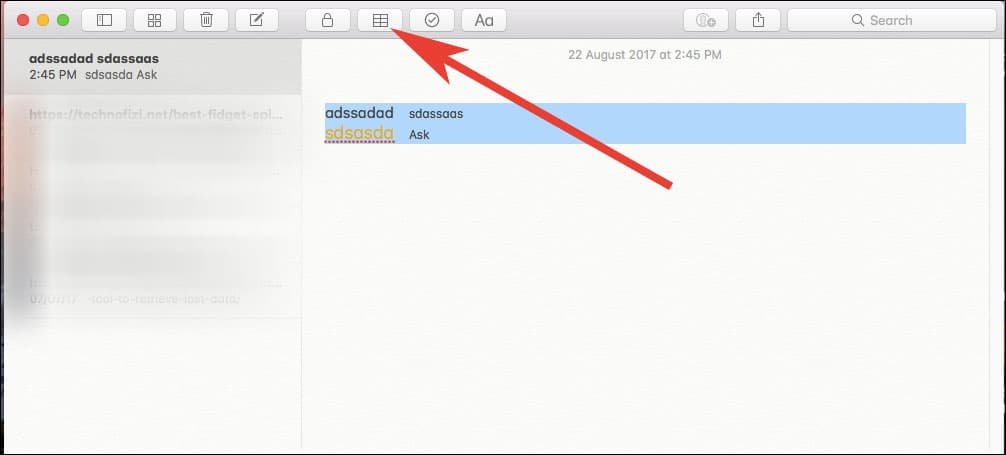
Step #2. Click on the Table button on the ToolBar. You can’t miss it; the icon is that of a Table. You can also go to Format and click on Tables if you like. Whichever seems preferable.

Step #3. Now start typing and filling the boxes.
Step #4. To navigate between the boxes, you can tap on Tab or click on the respective boxes.
Step #5. Hitting the Return Key will move you to the next row.
How to Add Column and Rows to your Tables
Step #1. First off, open Notes App, and select the Note in which you want to add a Column or Row. The procedure also works with a new empty note.
Step #2. To create a new Row, place the cursor to the last row and hit Return.
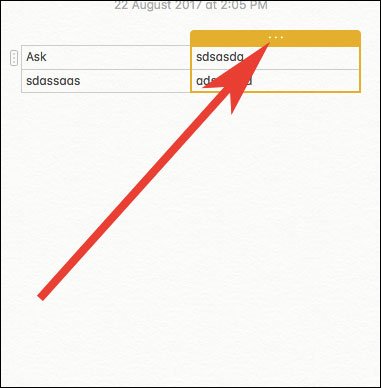
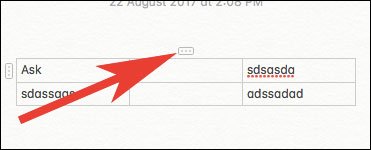
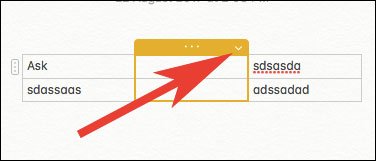
Step #3. To create a new Column, first put your cursor on any cell and hit the ellipses button when it appears on the top of the column.
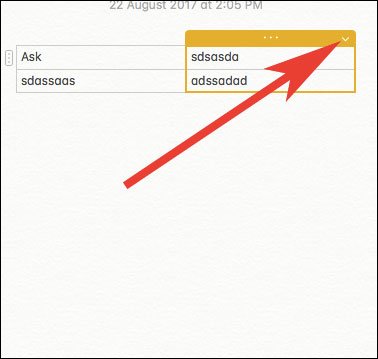
Step #4. Then click on the downward arrow which appears on the top right corner of the column.
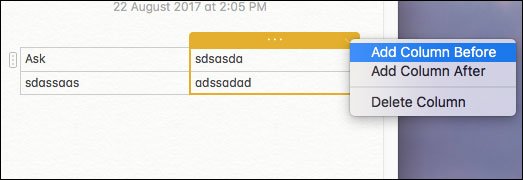
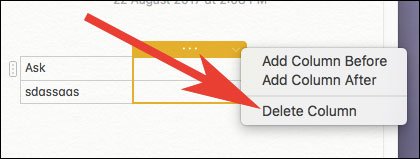
Step #5. Here you will find options like Add Column Before, Add Column After and Delete Column.
How to Rearrange Rows and Columns
Step #1. Again, Open Notes App and select the note which you want to manipulate.
Step #2. Now place the cursor in a cell of the Column or Row you want to rearrange.
Step #3. A small ellipses button will appear to the left of the row or at the top of the column.
Step #4. Click and hold on the ellipses of the corresponding column or row which you want to move.
Step #5. Now simply drag the row or column to a new position as per your fitting. The other rows and column will get out of its way.
How to Remove Columns from Tables
Step #1. Similar to the above examples, open Notes App and select a note which has a Table.
Step #2. Now Place your Cursor on any cell of the column which you want to remove.
Step #3. Click on the ellipses button which appears to the top of the column. The column will get highlighted in yellow and a downward arrow will appear to the top right corner of this yellow box.
Step #4. Click on the arrow and a pop-up will appear with a few options.
Step #5. Delete Column will be presented here. Click it and your column will be removed.
How to Convert Text to a Table
Step #1. Open the Notes App and navigate to an Old note or Create a New one.
Step #2. Select multiple lines of text. The feature works ideally with a list of text.
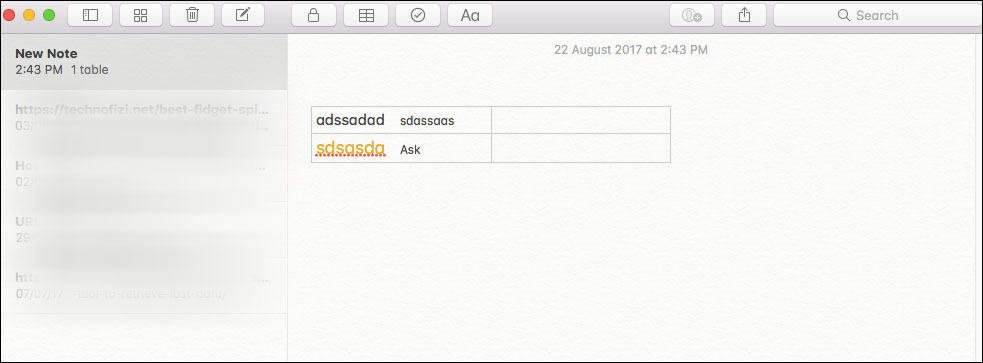
Step #3. With the text selected, simply click on table icon from Notes app toolbar. Doing so will create a table with all the selected text arranged inside the first column.
How to Convert a Table into Plain Text
Step #1. Open Notes App and navigate to a note which has a table.
Step #2. Click anywhere on the Table to select it.
Step #3. Now go to the ToolBar and then click on Table.
Step #4. You will see the Convert to Text option available over here.
Step #5. Another alternative would be to go to Format and click on Convert to Text, which is also available there.
How to Format Text Inside a Table
Step #1. Launch Notes.
Step #2. Now Press Command – T. This will call up the Fonts Window.
Step #3. Now select a particular Text and use the Fonts Windows to change the Text’s Font, typeface, size and color.
Step #4. You can make the text bold by pressing on Command – B.
Step #5. You can make the text Italics by pressing on Command -I.
Step #6. You can add a hyperlink to the text by pressing Command – K.
Step #7. You can also change the alignments. Command – {moves the text to the left. Command + | moves the text to the centre. And Command +} moves the text to the right.
Step #8. However, use of checkboxes and ability to add images is not provided.
How to Delete content from Multiple Cells
Step #1. Open the Notes App and find the Note where you want to delete the content.
Step #2. Now click on a cell and drag it across the table. This maneuver will create an orange outline around the selected area.
Step #3. Now right click on the selected outline and click on Delete Cell Contents.
So this is how you can create tables in Notes App on MacOSHighSierra. Once you create tables in Notes app, you can do multiple tasks as mentioned above. Share your feedback with us on Facebook, Twitter and Google Plus.
